Buttery, Rich Caramel Apples: A Fall Must-Have
The spooky season creates a certain magic in the kitchen. It’s a fun magic that conjures quality family time and laughter-filled moments with stories shared over steaming mugs of hot chocolate and, sometimes, sticky fingers. And at the heart of the sticky fingers? The humble caramel apple.
Making caramel apples isn’t just about creating a sweet treat. It’s about creating memories that will last a lifetime, how a child’s eyes light up as they sink their teeth into that first bite, and the warmth and comfort you feel knowing that “homemade” is an act of love and what home truly means.
Ready to dive into the sticky, sweet world of homemade caramel apples? It’s a journey worth taking and a fun, easy activity perfect for the whole family. Before preparing the caramel, you’ll want to prep the apples so they’re ready to dip. Here are some simple steps and tips:
- Thoroughly rinse and dry the apples. If the apples you bought are waxy, you’ll want to remove the wax; otherwise, the caramel will not stick to the apples. To remove wax from apples, use a large slotted spoon to dunk each apple into a pot of boiling water for no longer than 5 seconds. After removing the apple from the boiling water, rub the apple with a paper towel to remove any remaining wax. Dry each apple completely.
- Insert a wooden popsicle stick, a candy apple stick, or even a clean, small, sturdy stick from a tree into each apple from the top down. Push the stick far enough into the apple so that it will stay put. Set the apples on a baking sheet, then place the baking sheet with the apples in the refrigerator for 30 minutes. Cooling the apples will make it easier for the caramel to stick to them.
- Prepare the caramel, then cool for a few minutes until it has thickened up, but not so thick that you cannot swirl the apples when dipping them.
- Set a piece of parchment paper into a baking sheet (different than the baking sheet with the apples). Spray a thin coating of cooking spray onto the parchment paper.
- Remove the apples from the refrigerator and dry them if condensation is on the skins.
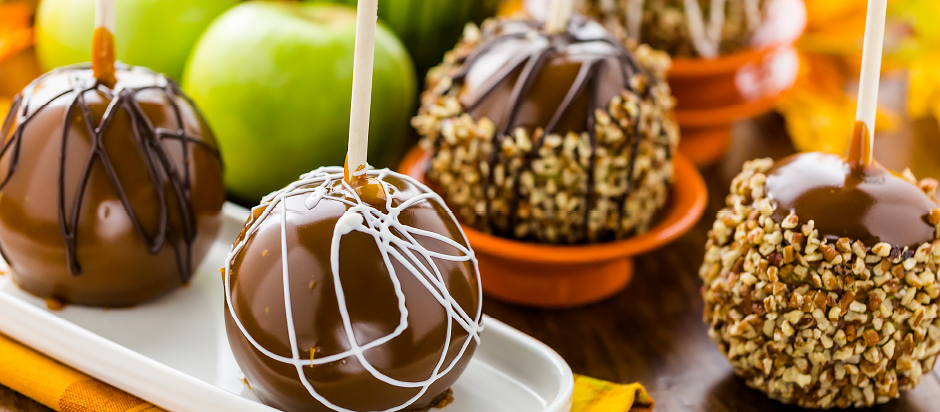
- Holding onto the popsicle stick, dip each apple into the caramel, turning the apple to coat it with the caramel. Before setting each caramel-coated apple onto the baking sheet with the parchment paper, let any excess caramel drip off the apple.
- If you plan on double dipping the apples for an extra coating of caramel or any other coatings like melted chocolate, the first layer must be completely cool before re-dipping. If the dipping caramel starts to harden to the point that it’s too hard to swirl the apples, you can reheat the caramel so it melts to the proper consistency.
- If desired, before placing the caramel-coated apples onto the parchment paper to cool, roll each apple in the toppings you choose, like finely chopped nuts, chopped candy bars, sprinkles, cereal, crushed cookies, mini marshmallows, etc. Note: Small-sized toppings will stick to the apples better than large-sized toppings.
- Once you’ve finished dipping and topping the apples, refrigerate them for approximately 45 minutes or until the caramel sets.
After reading Lauren’s Latest post about Gourmet Caramel Apples, she’ll inspire you to make her jaw-dropping, beautiful caramel apple recipes.
Sink your teeth into the ultimate sweet-and-salty indulgence: crisp apples enrobed in gooey caramel, studded with crunchy peanuts, and crowned with a smoky sprinkle of crumbled bacon. This Bacon Caramel Apples recipe from Hormel will not let you down.
If any food can set the mood for Halloween, it will be Poison Toffee Apples for Halloween from Simply Delicious Food. Everyone will want to take photos of these wickedly sinister treats for their social media feeds. And they taste ghoulishly good!
Other great apples to use for caramel apples are Honeycrisp, Jonagold, and Pink Lady. Abundant in-season apples are budget-friendly, so grab your favorites for sweet and savory fall recipes! Eat, drink, and be scary!